Overview.RmdOverview
Duration: 2 hoursObjectives
- Create an R Notebook and export it as HTML
- Configure Notebook title and metadata
- Add text to Notebook and format it using Markdown
- Write codes in chunks to output standard tables and plots
- Generate interactive tables and plots
In this workshop, we will create a dynamic report using R Notebook. Please ensure that you have BOTH R and RStudio installed on your computer. Click on the links below to download these software.
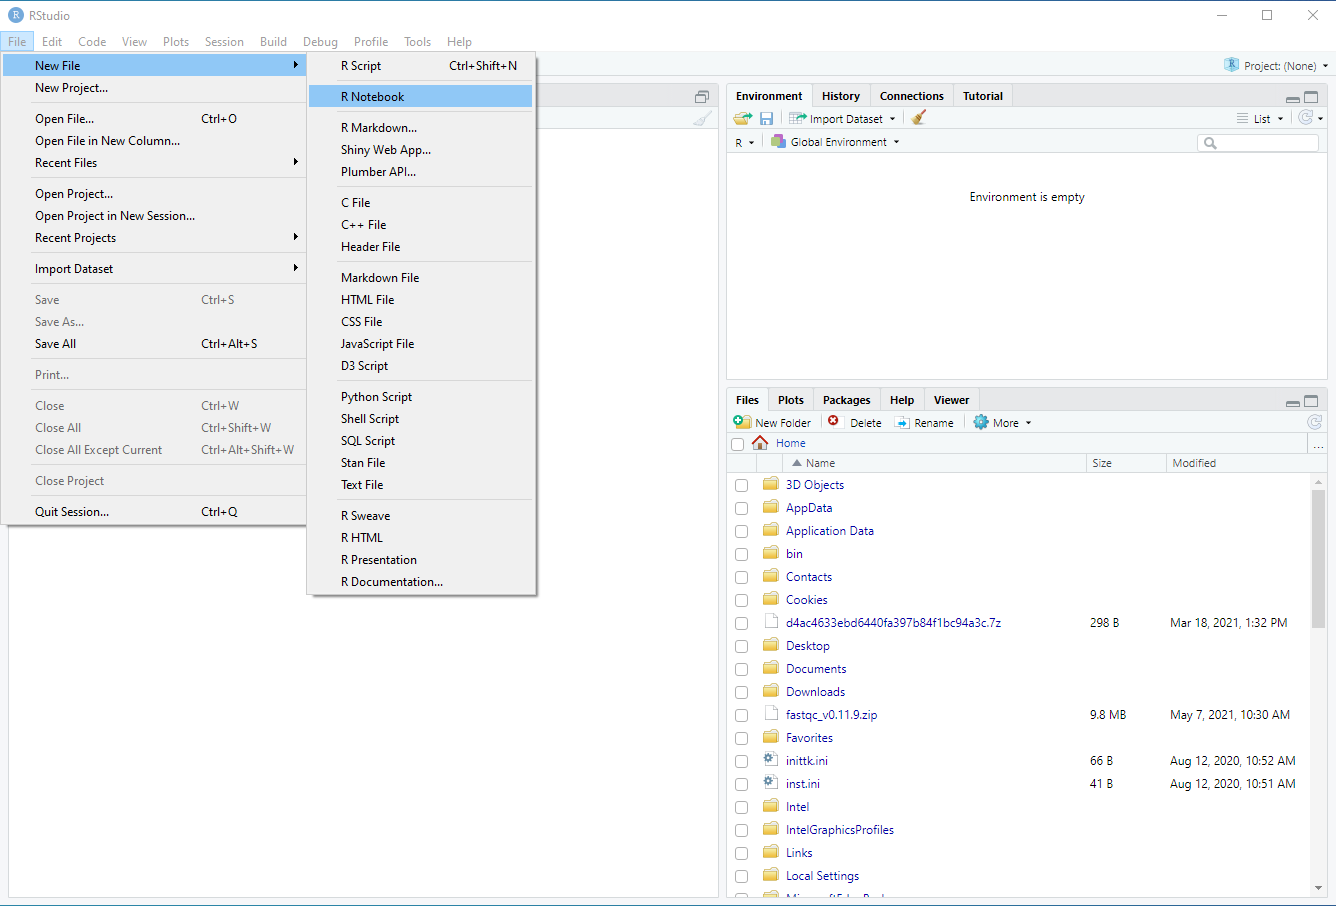
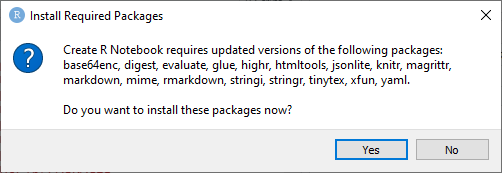
Several dependencies are required to create an R Notebook. To facilitate the timeliness of the lesson, please follow these instructions to set this up (clicking the instructions will bring up an image illustrating each step):
Upon successful installation, a new R Notebook document will open in RStudio. If you encounter errors during this installation, please e-mail me with a description of the error.
During the lesson, we will be using etherpad, an online collaborative platform for our discussions and activities. You may bookmark this etherpad page before the lesson commence!
| 10:00 | Overview | What is the purpose of an R Notebook How does an R Notebook improve my workflow? |
| 10:10 | 1. Creating and saving R Notebooks | How do I create an R Notebook? Where can I find the output HTML file? |
| 10:15 | 1. Configuring R Notebook | How do I change theme of HTML document? How do I add tables of content? |
| 10:25 | 2. Adding and formatting text in Markdown format | How do I add text descriptions? How do I format text? |
| 11:00 | Break | |
| 11:10 | 3. Writing code in R Notebook | How do I add code into my document? How do I configure the output of my code? |
| 11:20 | 3. Creating interactive plots and tables | How do I add plots and tables to my HTML document? How do I make my plots and tables interactive to users? |
| 12:00 | Finish |